House Renovation Continuation…
Matt and I decided to change the current windows (which are aluminium, sliding frames) and keep with the Queenslander look of the home. We started looking for casement windows and ended up purchasing a few different styles, ranging in price from $2 to $50 each. We ended up purchasing around 10-15, all requiring some serious TLC! We thought to put these windows in the second bathroom, main bedroom, garage and potentially in the current bedrooms. But honestly, we have I think, 4 different styles of windows, so it’s a matter of figuring out how many we can restore and reuse, to determine where we actually end up putting them. So here’s hoping it works out!
Now, as usual… We have fabulous ideas and no idea how to actually make it happen, so I YouTube some videos on how to restore casement windows. I’ve compiled a few videos I thought were the most helpful in terms of order of restoration, tools required, and how to reassemble. Hopefully you find these helpful with your project!
This YouTube video by ‘Garden Fork’ shows how to remove the old putty and refill.
This video by ‘Marc Bagala’ shows a full restoration from start to finish, however, there’s no talking so you really need to watch what he does. I thought this video was helpful in terms of showing me what needed to be done.
Now, this PDF is a couple of pages but lists the general tools you need to complete this project and a step-by-step written tutorial. Handy for those who can’t access YouTube or want to take some information away with them when they shop for the tools needed, et cetra.
http://www.familyhandyman.com/windows/repair/how-to-glaze-a-window-single-pane
My attempts at window restoration!
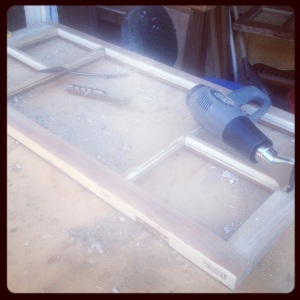
Now, before I watched all these YouTube tutorials, I thought, how hard could this really be. Matt and I knew what roughly needed to be done, so we went out and bought a heat-gun (how ironic that my first ‘power tool’ should turn out to be an industrial hair-dryer! lol). I got my work area setup and started to strip the paint. It was all going well until I had to strip the fiddly bits around the glass. Unsurprisingly, I ended up cracking 2 window panes. So… Matt and I re-evaluated our method and I jumped on YouTube.
Here’s my second attempt. 10-August-2013. I removed all the old putty and took the glass panes out. I only cracked 1 piece of glass and that was due to the putty being extreme resilient and I ended up putting too much pressure on the glass in my attempts to remove the putty. Needless to say… I was very proud of my efforts.
I then used the heat gun and started to strip the paint. Much easier when you’re not worrying about glass. And I used an orbitol sander to start finishing the prep. I still have to use a fine sand paper on the frame and hand sand the detailing around the glass panes. But… I’m getting there, that’s the most important thing!
I’ll keep you posted with my progress and take pictures as I go… So looking forward to the finished product! It might take me a few months though…

