I’ve been away on holidays and haven’t created anything in a while, but I wanted to share these two websites I came across. I think they are great with heaps of tutorials and recipes as well.
Bake Happy
&
Our Best Bites
xo
I’ve been away on holidays and haven’t created anything in a while, but I wanted to share these two websites I came across. I think they are great with heaps of tutorials and recipes as well.
Bake Happy
&
Our Best Bites
xo
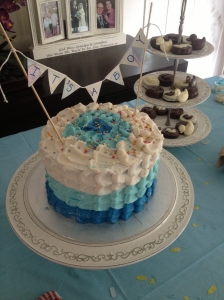
Petal Technique – Ombre!
One of my girlfriends is having her second baby…. a boy! I volunteered to make her baby cake and decided on everything blue.. Ombre style! I’ve put together this little tutorial for you all so you can also learn how to make these fabulously simple, but effective cakes! My main issue with the petal technique… I found my lines were not very straight. Even though I thought I was following the correct line, I had some “waves” happening. With more practice, I’m sure it would be easier to make each dot the correct size and length, etc.

What you will need:
Cake(s)
Frosting
Teaspoon or spatula
Piping bag
Round piping tip
Cake Ingredients:
Depending on the number of layers you want to create, double this batch.
Melted butter, to grease
450g (3 cups) self-raising flour
150g (1 cup) plain flour
440g (2 cups) caster sugar
300g butter, cubed, at room temperature
310ml (1 1/4 cups) milk
6 eggs, at room temperature
3 tsp vanilla essence
Desired food colouring
Crisco Butter Cream Frosting
Makes around 3 cups
1/2 cup solid vegetable shortening
additional 1/2 cup butter or margarine softened
1 teaspoon clear vanilla extract
4 cups sifted icing mixture
2 tablespoons milk
Desired food colouring
OR
Classic American Butter Cream Frosting
Makes around 2.5cups
1 cup unsalted butter, softened (but not melted!) Ideal texture should be like ice cream.
3-4 cups icing mixture, SIFTED
¼ teaspoon table salt
1 tablespoon vanilla extract
up to 4 tablespoons milk or heavy cream
Desired food colouring
Method (Cake):

Method (Frosting):
In large bowl, cream shortening (or if using American frosting all butter) and butter with electric mixer. Add vanilla. Gradually add icing mixture, one cup at a time, beating well on medium speed. Scrape sides and bottom of bowl often. When all icing mixture has been mixed in, icing will appear dry. Add milk and beat at medium speed until light and fluffy. Keep bowl covered with a damp cloth until ready to use. For best results, keep icing bowl in refrigerator when not in use. Refrigerated in an airtight container, this icing can be stored 2 weeks. Rewhip before using.
For thin (spreading) consistency icing, add 2 tablespoons light corn syrup, water or milk.
For stiff consistency, add more icing mixture until desired consistency achieved.
Divide frosting into even batches (depending on number of colours you want to do). Add food colouring to each batch until desired colour achieved. Add more icing mixture if frosting becomes too thin!
Put a light coat of butter cream over the cake. This is your crumb layer and will give you a smooth, even surface to start decorating on.

Here’s a cute tutorial I found on Cake Central by ‘The Hungry Housewife’. I’ve also included her youtube video which clearly shows each step!
http://cakecentral.com/b/tutorial/blue-ombre-petal-cake-tutorial


Here’s my first attempt!! Hope you all enjoy this. X
Happy Baking

References:
http://savorysweetlife.com/2010/03/buttercream-frosting/
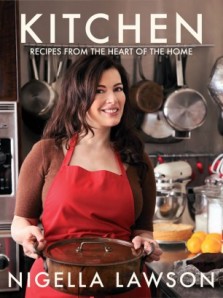
You can never go wrong with a Devil’s Food Cake… I came across this recipe a very long time ago and I love it! The trick with this recipe (as with all) is to read all the way through first.
“While you’re making it, don’t panic. The mixture will seem very runny for ages once the chocolate has melted and you will think you have a liquid gleaming glaze, beautiful but unfit for purpose; leave it for about an hour, as stipulated, though, and it will be perfect and spreadable. It never quite dries to the touch, but this is, in part, what makes the cake so darkly luscious. Goo here is good.”

Recipe by Nigella Lawson
for the cake:
50g best-quality cocoa powder, sifted
100g dark muscovado sugar
250ml boiling water
125g soft unsalted butter, plus some for greasing
150g caster sugar
225g plain flour
1⁄2 teaspoon baking powder
1⁄2 teaspoon bicarbonate of soda
2 teaspoons vanilla extract
2 eggs
for the frosting:
125ml water
30g dark muscovado sugar
175g unsalted butter cubed
300g best-quality dark chocolate finely chopped
2 x 20cm sandwich tins
Method
Serves: 10 – 12
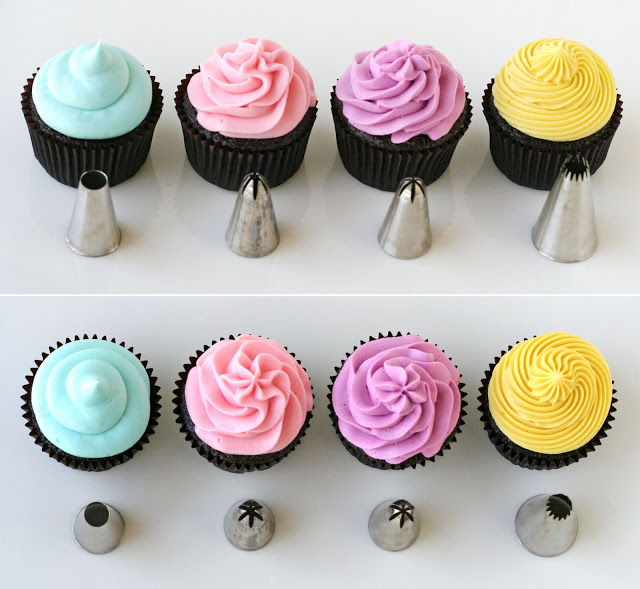
Cupcake Frosting Techniques
I came across these 2 cute blogs by ‘Glorious Treats‘ and ‘Niner Bakes‘. They have a page all about frosting techniques and a few different frosting recipes you could try! I’ve added their photos to show you what each tip can create.
Here’s the link to Glorious Treats (these are her pictures below)


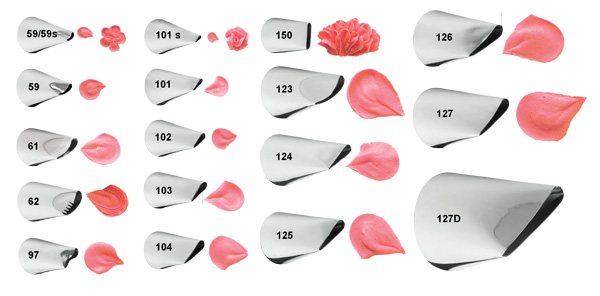
Cupcake Frosting Technique using a Wilton Tip #97
This is a very cute ruffle technique tutorial by ‘strawberrychicblog’. I can see this at baby showers (pink and blue ruffles)!
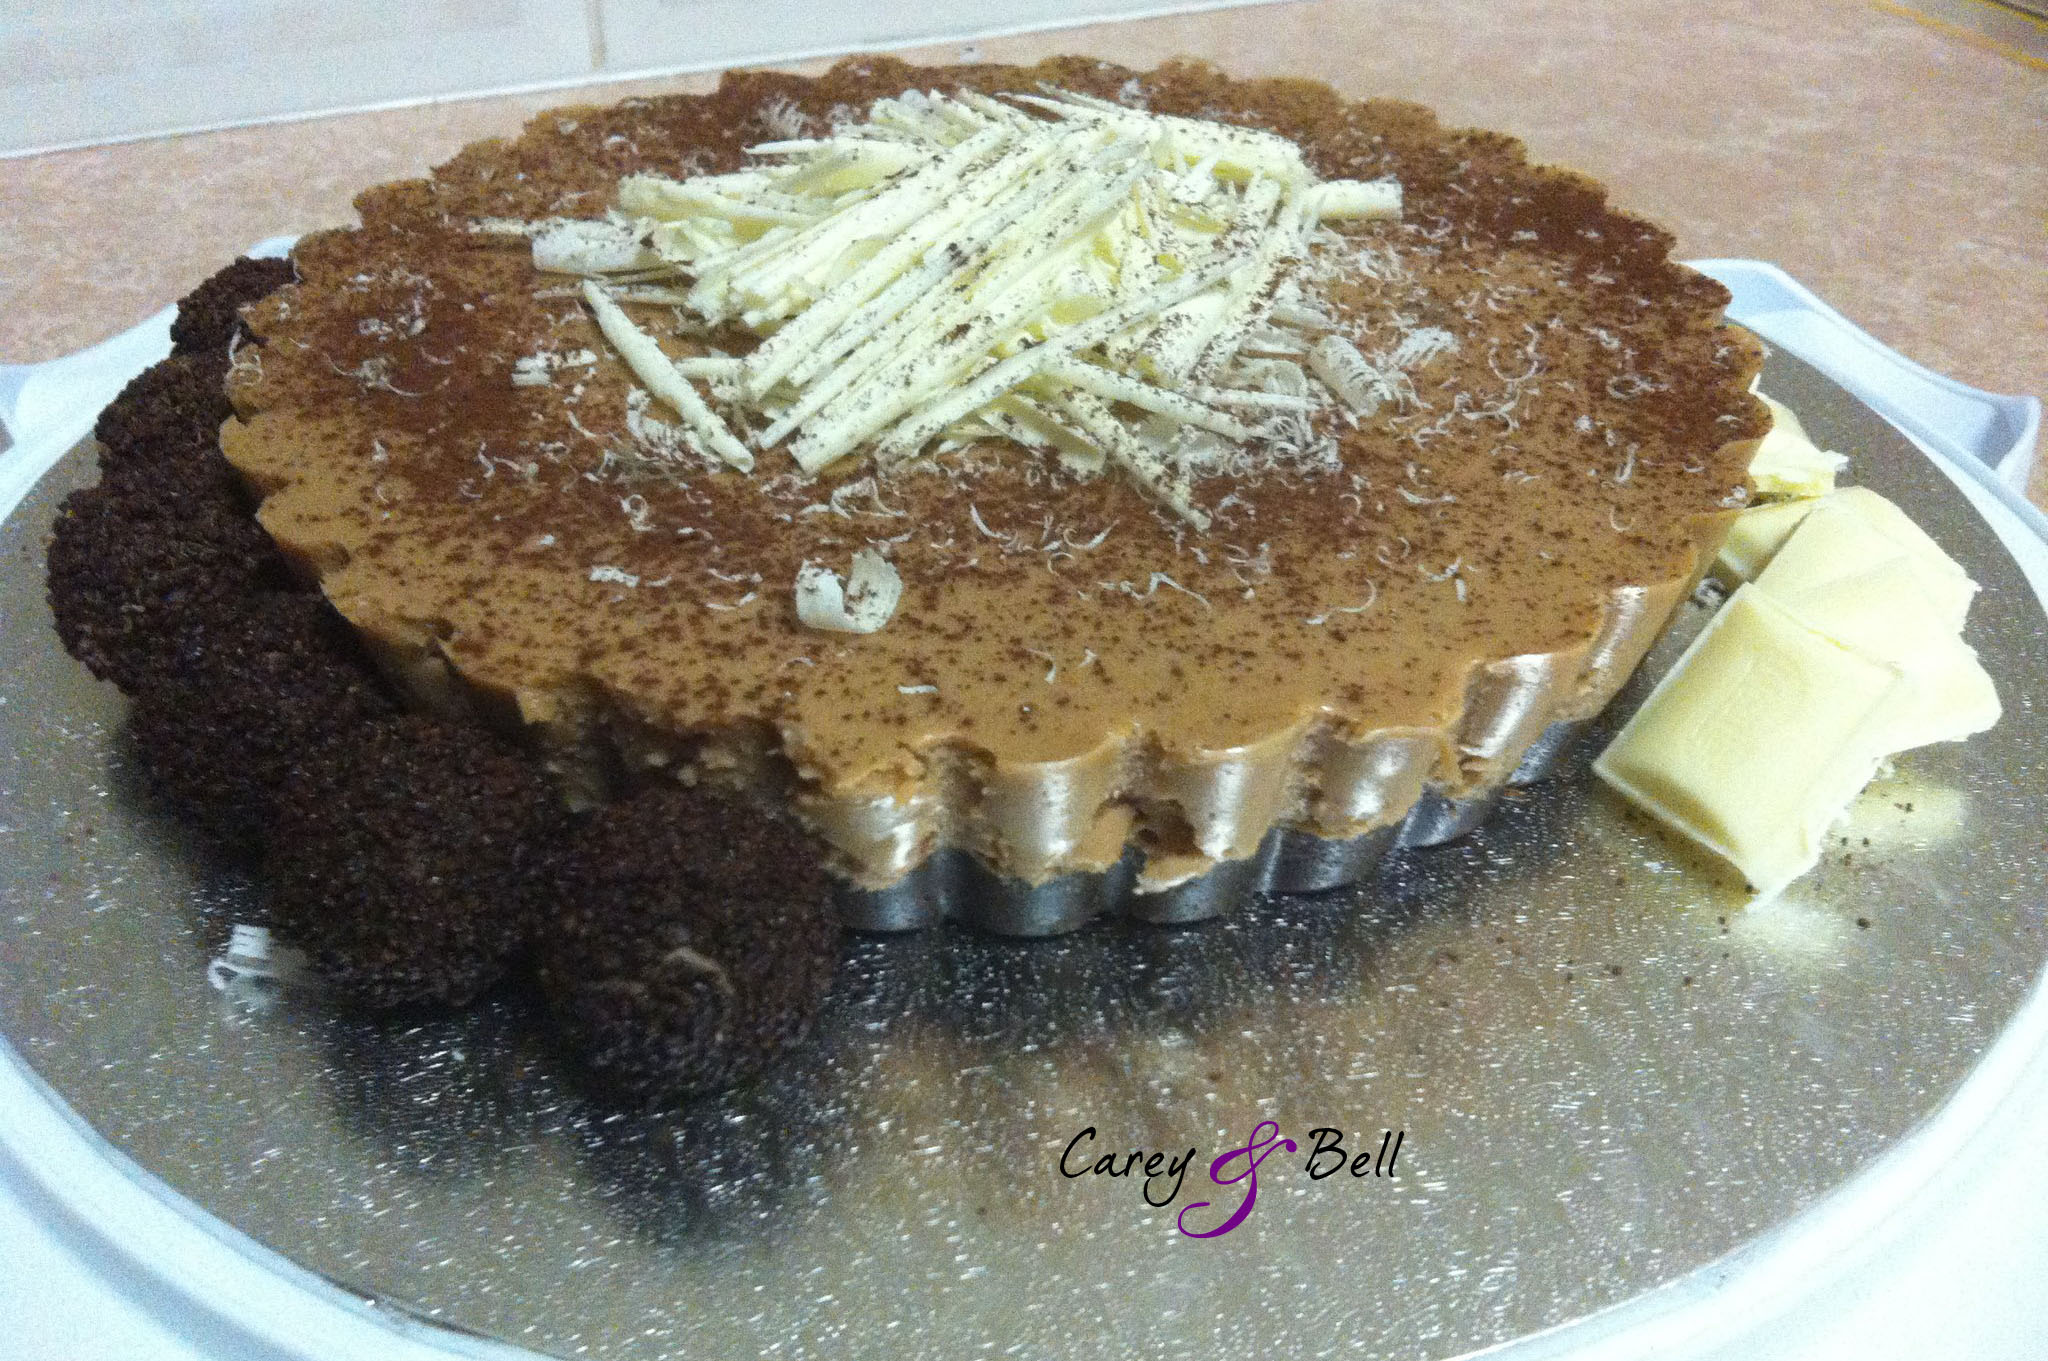
This is one of my most requested desserts! So easy to prepare and make. No baking required.
**You can use any type of chocolate you like
INGREDIENTS
BASE
1 packet plain chocolate biscuits
*(I use Arnott’s Choc Ripple and usually use 1/2 to 3/4 of packet)
80g butter, melted
1/4 cup almonds (optional)
FILLING
500g block PHILADELPHIA Cream Cheese, softened
*(I generally use 250g of Original and 250g of Light)
*(I wouldn’t recommend 500g of Light… not as tasty)
1/2 cup caster sugar
200g TOBLERONE** Milk or Dark Chocolate, melted
*(I’m a HUGE chocolate fan and have used 600g chocolate)
1/2 cup thickened cream
TOPPING
200g TOBLERONE** Milk or Dark Chocolate for shaving
METHOD
Biscuit Base
1. Lighty grease or line with baking paper a 20cm baking dish/springform pan.
2. Put biscuits into a food processor and process until fine crumbs. Transfer to mixing bowl.
3. Put almonds into a food processor and roughly chop. Add to biscuit crumbs.
4. Add melted butter to biscuit and almond mixture.
(I know I said 80g butter, but I would add small bits at a time in case you don’t need the whole 80g. Basically… you want to add enough butter to get the biscuit crumbs to combine).
5. Once combined, put biscuit crumb base into the pan and use hand to distribute evenly on the base.
6. Place in fridge to chill.
Cheese Cake Layer
2. Beat cream cheese and sugar using an electric mixer until smooth.
3. Melt Toblerone**
4. Add in the melted Toblerone** and cream to the cream cheese mixture and beat until well combined.
5. Pour mixture onto the prepared crumb base and refrigerate for 2 to 3 hours until set, or overnight.
6. Serve topped with the Toblerone** shavings.
So easy. I hope you enjoy this one as much as I do.

How to use Silicone Molds with Fondant and Gum Paste
How to make a bow using fondant
This YouTube tutorial by ‘Exquisitely Abby’ shows you how to make miniature bows out of fondant. Very simple! I used this technique to create my Black and White themed cupcakes.
Piping Techniques using a Wilton 21 Tip
This YouTube video by ‘LeCordon Bleu’ demonstrates how to create rope, shells, e-motions using a tip similar to Wiltons 21 tip. This shell technique is what I have used to decorate the boarder of my cakes: Elmo, Dinosaur, Pirate, Blue’s Clues and Care Bear.


My all time favourite dessert!! I remember my cousin made this at my grandmother’s place many, many moons ago and I fell in love! I think I was 11 years old and I asked mum if we could make this. Well… the first attempt failed and I ended up with a flat disc. Mum had an idea to keep baking this thing and turned it into ‘failed pavlova biscuits’. Actually really yummy! I realised the error I’d made… the recipe asks to fold in corn starch and I may have added self-raising flour instead. Needless to say, I never made that mistake again.
Ingredients
6 eggs, separated
1 1/4 cups caster sugar
2 tsp cornflour/cornstarch
1 tsp white vinegar
1/2 tsp vanilla extract
300 ml thickened cream
Fruit of your choice
Method:
Step 1
Preheat oven to 120°C. Line a baking tray with baking paper. (I cheat and use a dinner plate to mark out my circle). Place a dinner plate in the middle of your baking tray and gently dust the edge with corn starch. Life the plate. You will be left with a nice circle which I find helps me mould my pavlova shape (that is, I actually end up with a circle!). Dust the circle with more corn starch, then shake off any excess.
Step 2
Use an electric mixer to whisk egg whites in a clean dry bowl until soft peaks form. Gradually add sugar, 1 tablespoon at a time, beating well after each addition, until meringue is thick and glossy and sugar dissolved. Rub a little meringue between fingers. If still “gritty” with sugar, continue to whisk until sugar dissolves. Add cornflour, vinegar and vanilla and whisk until combined. Spoon meringue onto the baking paper, using the marked circle as a guide. Smooth sides and top of pavlova. Use a small spatula to forms little peaks around edge of pavlova. Bake in oven for 1 1/2 hours or until pavlova is dry to the touch. Turn off oven. Leave pavlova in oven with the door ajar to cool completely. When completely cold, transfer to serving plate or store in an airtight container until required.
Step 3
Use an electric mixer to whisk the cream in a medium bowl until firm peaks form. Spoon cream onto the top of pavlova and decorate with fresh fruit.
You can colour the meringue with food colouring and create a pavlova stack.
Just add a couple drops of food colouring along with the corn starch, vinegar and vanilla.
Make another pavlova batch. Double the goodness!!


Nature surrounds us all--live in harmony with nature
cooking, indian cuisine, Michigan, Great Lakes, cats, bird watching, agates, antique glass
Live with what you LOVE
Food, Home & Faith
Food cooked and made with all my heart; putting a smile on your face
